
The Making of the CASA Oculus Rift Urban Roller Coaster
Earlier this year CASA was invited to create a virtual reality exhibit for the Walking on Water exhibition, partnered with Grand Designs Live at London’s ExCeL. While CASA has a tendency to spend a lot of time thinking seriously about cities and data it was quickly decided that a fun and novel way to engage the 100,000 or so expected visitors would be an urban roller coaster ride using the Oculus Rift Virtual Reality headset. Oliver Dawkins, a student on our MRes in Advanced Spatial Analysis is a leading light in urban visualisation and the Oculus Rift, as such he kindly offered to lead the development. In the following guest post, Oliver (of http://virtualarchitectures.wordpress.com/) talks us through the development process….

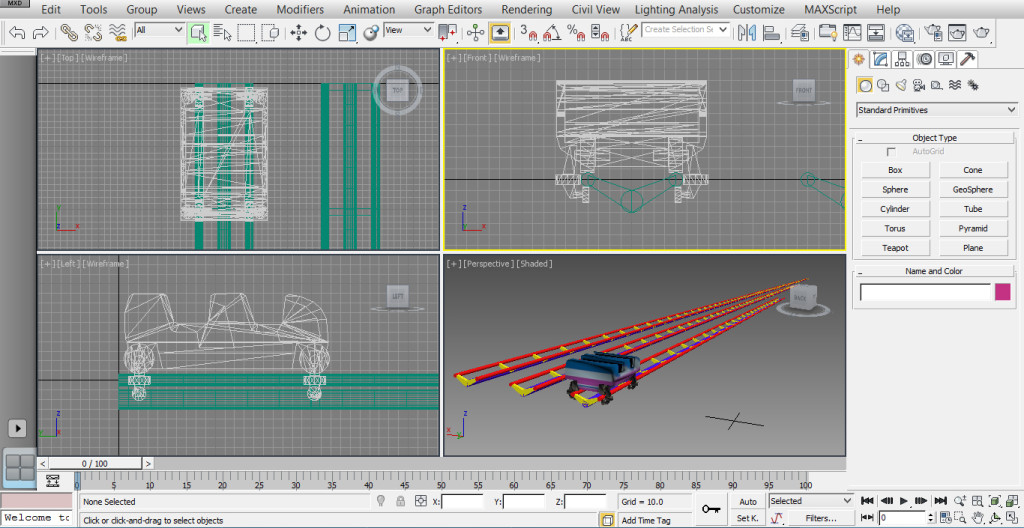
Although I like to use SketchUp for 3D modelling wherever possible 3ds MAX was much better suited to this project as it allowed me to quickly generate the city scene, model the roller coaster track, and animate the path of the ride, all in the one software package. After generating the urban scene I used the car from the Asset Store roller coaster as a guide for modelling my track in the correct proportions.
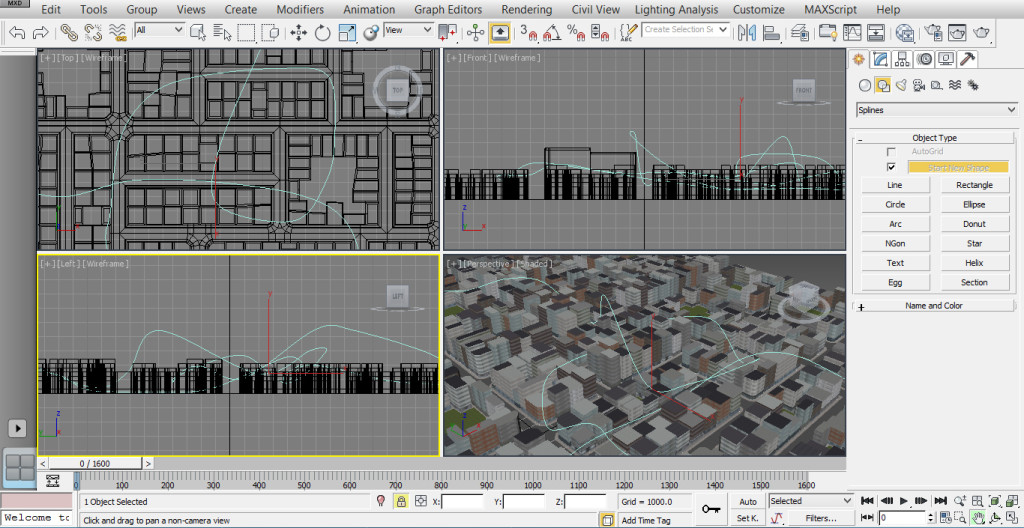
The path of the ride through the city was modeled using Bezier splines, first in the Top view to get the rough layout and then in the Front and Left views to ensure the path would clear the buildings in my scene. The experience needed to be comfortable to users who may not have experienced virtual reality before so it was agreed to exclude loop-the-loops on this occasion. It was also important to avoid bends that would be too sharp for roller coaster to realistically follow. Once I was happy with the path I welded all the vertices in my splines so that the path could be used to animate the movement of the roller coaster car along the track later.
Next sections of track were added to the path I’d created using the 3ds MAX PathDeform (WSM) modifier. As the name suggests this modifier deforms selected geometry to follow a chosen path. Using this modifier massively simplified the process by allowing my pre-made sections of track to be offset along the length of the path and then stretched, rotated and twisted to fit together as seamlessly as possible. This was the most intricate and time consuming part of the project.
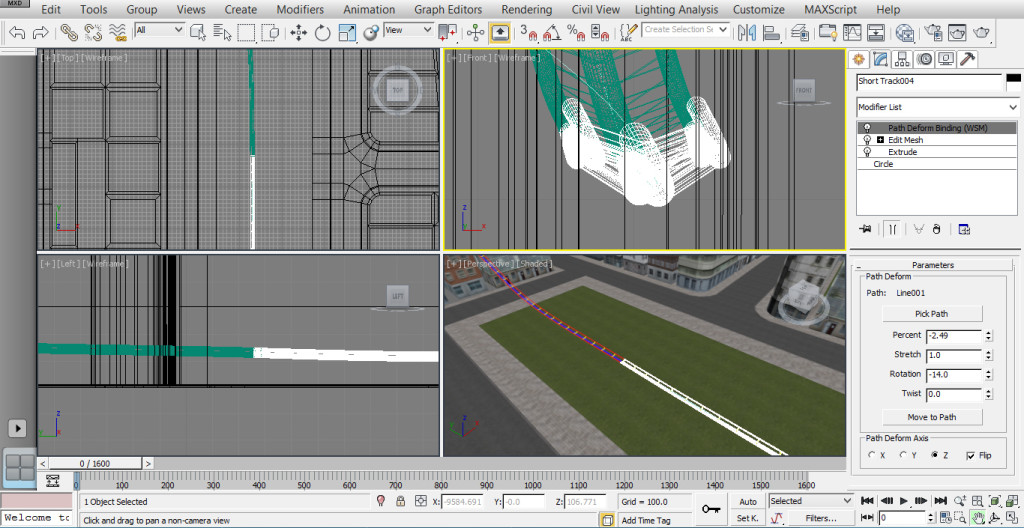
In order to minimise the the potential for motion sickness with the Oculus Rift I was careful to keep the rotation of the track as close to the horizontal plane as possible. Supporting struts were then arrayed along the path of the track and positioned in order to anchor it to the rest of the scene. When I was satisfied a ‘Snapshot’ was made of the geometry in 3ds MAX to create a single mesh ready for export to Unity. At this point the path deformed sections of track could be deleted as Unity does not recognise the modifier.
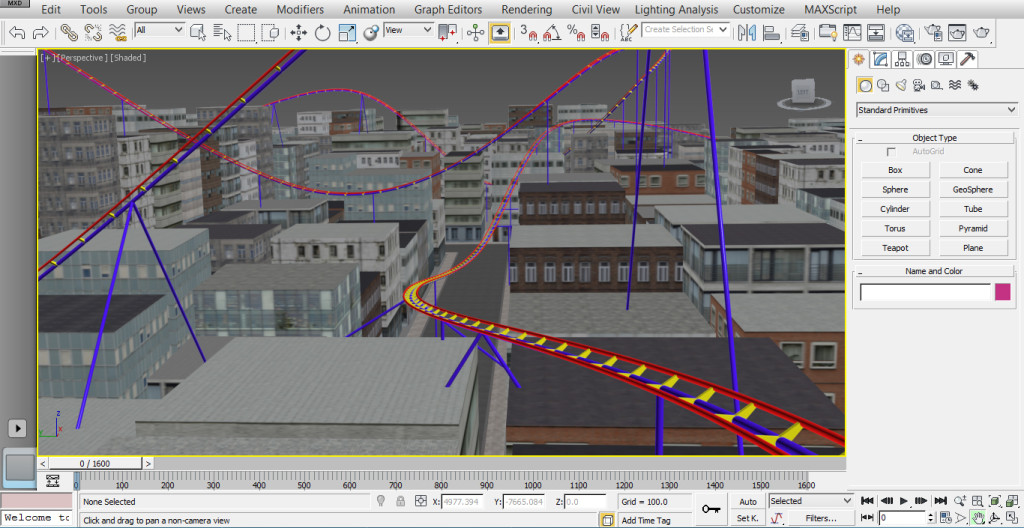
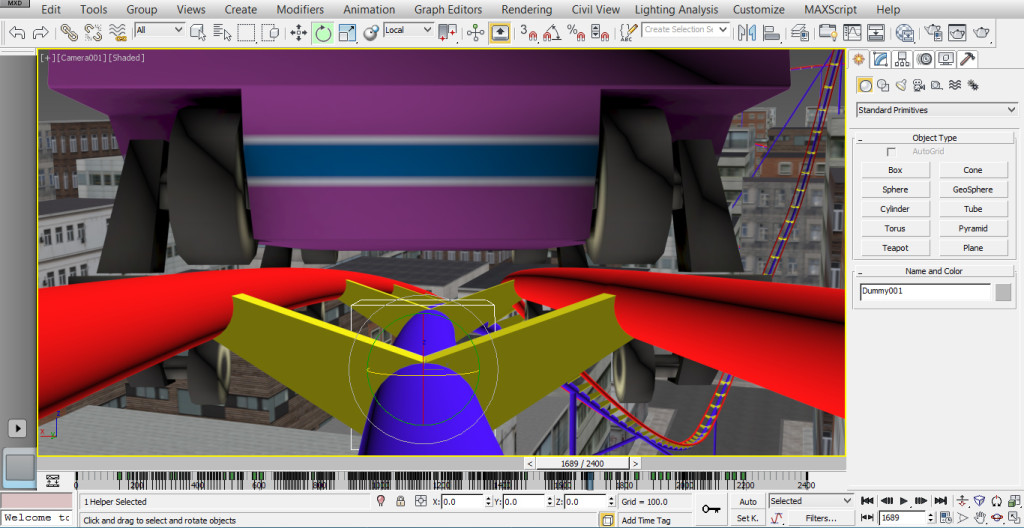
To create the movement of the roller coaster car along the track a 3ds MAX dummy helper was constrained to the path I’d created earlier. This generated starting and ending key frames on the animation timeline. The roller coaster car model was then placed on the track and linked to the dummy helper. It is possible in 3ds Max to have the velocity and banking of the dummy calculated automatically, but I found that this did not give a realistic feel. Instead I controlled both by editing the animation key frames using a camera linked to the dummy for reference. This was time intensive but gave a better result. The city scene, roller coaster and animation were exported as a single FBX which is the preferred import format for 3D geometry in Unity.
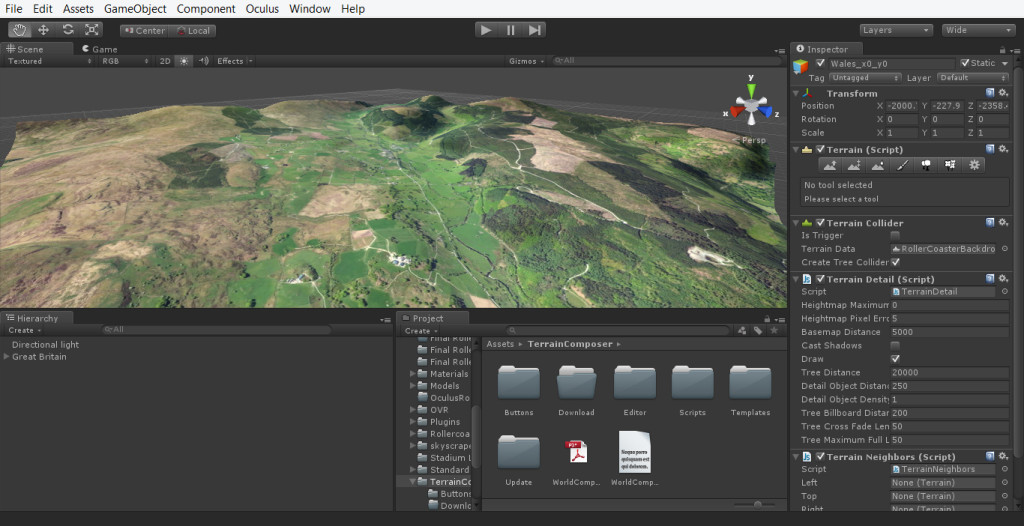
Having completed the track and animated the car it was time to assemble the final scene in Unity. First I generated a terrain using a great plugin called World Composer. This enables you to import satellite imagery and terrain heights from Bing maps to give your backdrops a high degree of realism.
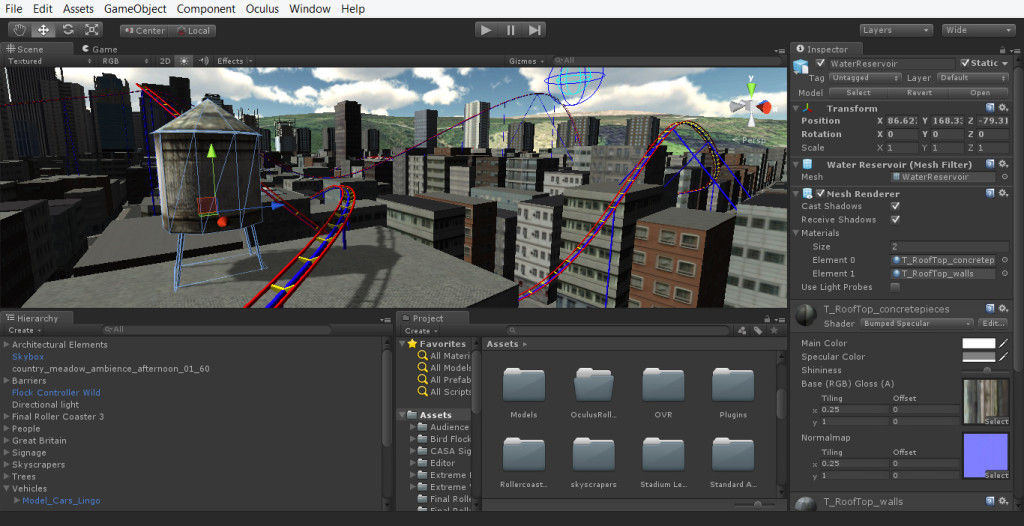
The urban scene and roller coaster were then imported and a skybox and directional light were added. The scene was completed with various assets from the Unity Asset Store including skyscrapers, roof objects, vehicles, idling characters and a flock of birds.
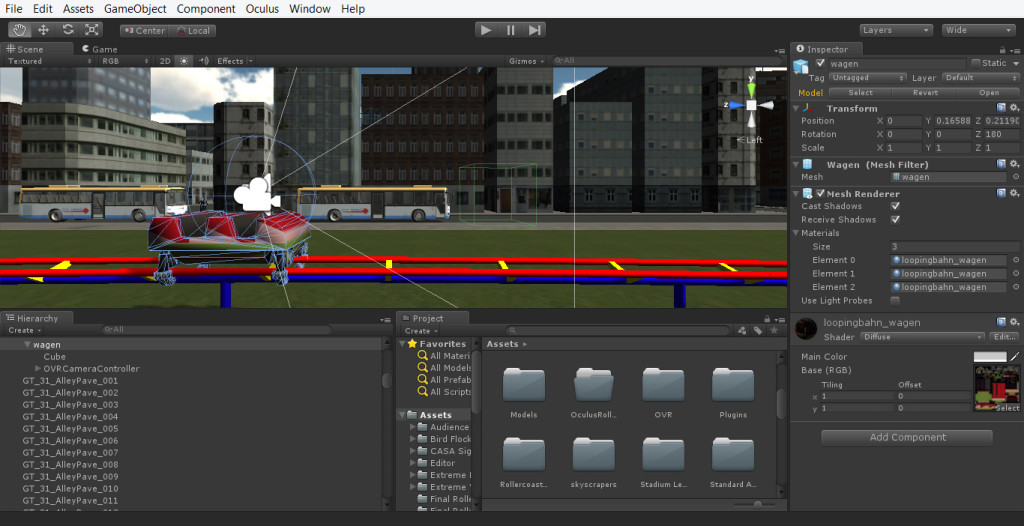
To prepare the Oculus Rift integration the OVR camera controller asset from Oculus was placed inside and parented to the roller coaster car. In my initial tests with the Asset Store roller coaster I’d found that OVR camera would drift from the forward facing position. This would disorientate the user and contribute to motion sickness. To prevent it with a quick fix I parented a cube to the front of the roller coaster car, turned off rendering of the cube so it would be invisible, and set the camera controller to follow the cube.
In order to ensure the best possible virtual experience it is really important to keep the rendered frames per second as high as possible. As the Oculus Rift renders two cameras simultaneously, one for each eye, you need to aim to render 60 fps in Unity so as to ensure the user can expect to experience a frame rate of 30 fps.
In order to achieve this I took advantage of occlusion culling in Unity Pro which prevents objects being rendered when they are outside the camera’s field of view or obscured by other objects.
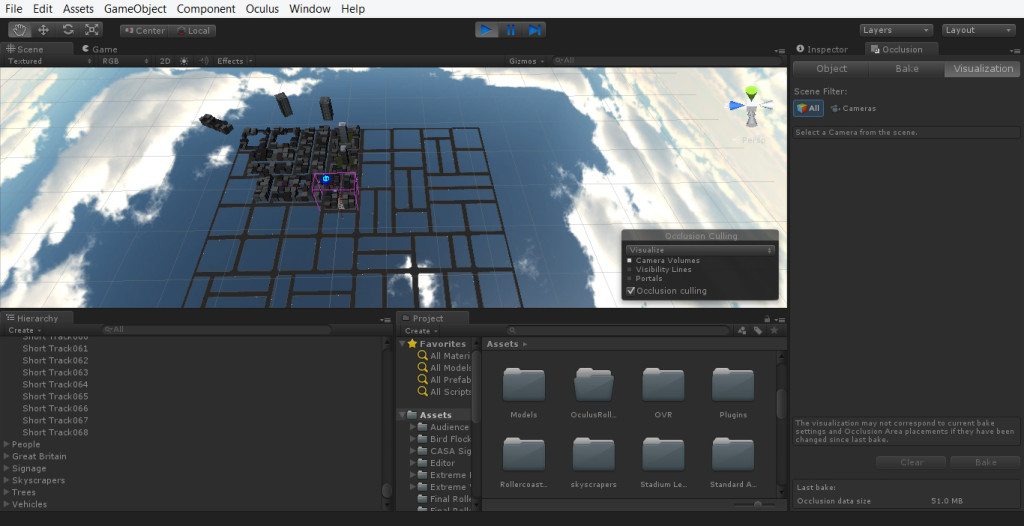
I also baked the shadows for all static objects in the scene to save them as textures which saves the processor calculating them dynamically. The only objects casting dynamic shadows are the roller coaster car and animated characters.
Finally two simple java scripts were added. The first would start the roller coaster and 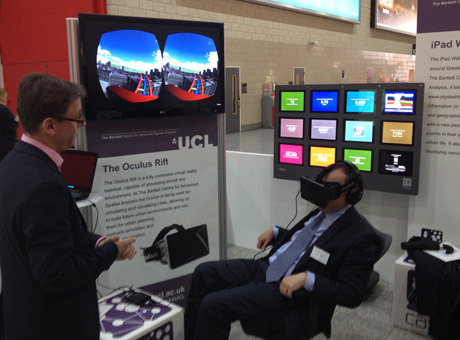 play a roller coaster sound file upon pressing the ‘S’ key. The second closed the roller coaster application upon pressing the ‘Esc’ key.
The reception of the CASA Urban Roller Coaster ride at Grand Designs Live was fantastic and I’m really pleased to have participated. It was a great project to work on and an excellent opportunity to learn new techniques in 3ds MAX and Unity. Having my first VR roller coaster under my belt I’m looking forward to building another truly terrifying one when I get the time, hopefully for the Oculus Rift DK2 which has just arrived at CASA.
On a last note I’d like to thank Tom Hoffman of Lake Earie Digital whose excellent YouTube tutorials on creating roller coasters in 3ds MAX provided a great guide through the most difficult part of this challenging project.
You can follow Oliver’s latest work at http://virtualarchitectures.wordpress.com/…..