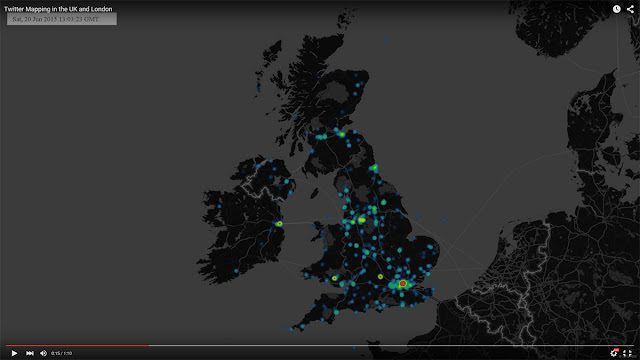
I committed to testing this a long time ago, however, a number of other projects intervened, so I have only just got around to writing up this short tutorial. One of the exciting things from the ESRI Developers Conference this year was the launch of the R-ArcGIS bridge. In simple terms, this enables you to run R scripts from within ArcGIS and share data between the software. In fact, this is all explained in a nice interview here.
I won’t go into detail about the R script itself, and the code can be found on github. If I am honest, this is pretty rough, and was written to demonstrate what could be done – that said, it should be usable (I hope… but don’t complain if it isn’t!). ESRI have also provided a nice example which can be found here, and was the basis of my code.
Preparing R
Before you can link ArcGIS Pro to R, you need to install and load the ‘arcgisbinding’ package, which is unfortunately not on CRAN. There are instructions about how to do this here using a Python toolbox; however, I preferred a more manual approach.
Open up R and run the following commands which installs the various packages used by the toolbox. You might also need to install the Rtools utilities as you will be compiling on Windows (available here). Although the TwitteR and httr packages are available on CRAN, for some reason I have been having issues with the latest versions failing to authenticate with Twitter; as such, links to some older versions are provided.
#Install the arcgisbinding package
install.packages("https://4326.us/R/bin/windows/contrib/3.2/arcgisbinding_1.0.0.111.zip", repos=NULL, method="libcurl")
#Install older versions of the TwitteR and httr packages
install.packages("https://cran.r-project.org/src/contrib/Archive/twitteR/twitteR_1.1.8.tar.gz", repos=NULL, method="libcurl")
install.packages("https://cran.r-project.org/src/contrib/Archive/httr/httr_0.6.0.tar.gz", repos=NULL, method="libcurl")
#Load the arcgisbinding package and check license
library(arcgisbinding)
arc.check_product()
Creating a Twitter Search App
Before you can use the Twitter Search Tool in ArcGIS Pro, you first need to register an app with Twitter, which gives you a series of codes that are required to access their API.
- Visit https://apps.twitter.com/ and log in with your Twitter username and password.
- Click the “Create New App” button where you will need to specify a number of details about the application. I used the following
- Name: ArcGIS Pro Example
- Description: An application testing R integration with ArcGIS Pro and Twitter
- Website: http://www.alex-singleton.com
- I left the callback URL blank, then checked the “Yes, I agree” to the developer agreement, and clicked the “Create your Twitter application” button.
- On the page that opens, you then need to click on the “Keys and Access Tokens” tab. You need four pieces of information that enable the Toolbox to link up with Twitter. The first two are displayed – “Consumer Key (API Key)” and the “Consumer Secret (API Secret)”. You then need to authorize this application for your account. You do this my clicking the “Create my access token” button at the base of the page. This creates two new codes which are now displayed – “Access Token” and “Access Token Secret”. You now have the 4 codes required to run a Twitter search in ArcGIS Pro.
R Script
I created an R script that:
1. Authenticates a session with Twitter
2. Performs a search query for a user specified term within a proximity (10 miles) of a given lat / lon location
3. Outputs the results as a Shapefile in a folder specified
The inputs to the script include the various access codes, a location, a search term and an output file location. These variables are all fed into the script based on Toolbox inputs. Getting the inputs is relatively simple – they appear in the order that they are added to the Toolbox, and are acquired via in_params[[x]]
where x
is the order number; thus search_term = in_params[[1]]
pulls a search term into a new R object called “search_term”. The basic structure of a script are as follows (code snippet provided by ESRI):
tool_exec <- function(in_params, out_params) {
# the first input parameter, as a character vector
input.dataset <- in_params[[1]]
# alternatively, can access by the parameter name:
input.dataset <- in_params$input_dataset
print(input.dataset)
# ... do analysis steps
out_params[[1]] <- results.dataset
return(out_params)
}
For more details about the functions available in arcgisbinding, see the documentation located here
How to use the Twitter Search Tool
The Twitter Search Tool was run within ArcGIS Pro and requires you to add a new toolbox. The toolbox should be downloaded along with the R script and placed in a folder somewhere on your hard drive. The files can be found on github here.
- Open ArcGIS Pro and created a new blank project called Twitter Map.
- Create a new map from the insert menu
- From the map tab, click the “basemap” button and select the OpenStreetMap tile layer
- Zoom into Liverpool on the map using the navigation wheel
- Find the latitude and longitude of map centre. These are recorded just under the map on the window border. The centre of Liverpool is approximately -2.95 (longitude), 53.4 (latitude) (although displayed as 002.95W, 53.40N)
- Click on the “Insert” menu, the “Toolbox” and then “Add Toolbox” buttons. Navigate to the folder where you have the Toolbox and R script. Click on the Twitter.tbx file and press the “Select” button.
- If you don’t see a side bar called “Geoprocessing”, then click on the “Analysis” tab and press the “Tools” button. After this is visible, under the search box there is a “Toolboxes” link. Click this and you will see the Twitter toolbox listed. If you look inside the toolbox you will see the Twitter Search script – click on this to open.
- Enter a search term (I used “Beatles” – hey we are in Liverpool), the Twitter authentication details, the location and where you want the output Shapefile stored. This defaults to the geodatabase associated with the project; however, you can browse to a folder and specify a Shapefile name – e.g. Twitter_Beatles.shp.
- Press the “Run” button and with luck you should now have a Shapefile created in the folder specified.
- Add the results to your map by clicking on the “Map” tab, then the “Add Data” button. Browse to where you saved the Shapefile and click the “Select” button.
The following screenshot is of the Shapefile shown on an OpenStreetMap basemap; with the attribute table also shown – you will see that the full Tweet details are displayed as attributes associated with each point.
Anyway, I hope this is of use and can assist people getting started linking R to ArcGIS.
Continue reading »